DIY Turtle Basking Platforms: Step‑by‑Step Builds
As a long‑time reptile enthusiast and turtle keeper with nine years of firsthand experience, I know how critical a proper basking spot is for your aquatic shelled friend. Inadequate basking areas can lead to shell rot, metabolic bone disease, and stress. This guide, drawn from both practical builds and expert advice, walks you through creating sturdy, attractive basking platforms from everyday materials—no specialized tools required.
Why a Good Basking Platform Matters
Thermoregulation: Turtles need to dry off and absorb heat and UVB to synthesize vitamin D₃.
Shell Health: Consistent basking prevents fungal infections and promotes healthy growth.
Behavioral Enrichment: Platforms encourage natural climbing and resting behaviors.
Materials & Tools You’ll Need
Materials:
Food‑safe PVC pipe (1" diameter)
Non‑toxic aquarium‑safe silicone sealant
Smooth river rocks or slate tiles
Plastic mesh or expanded PVC board
Tools:
Waterproof gloves
Measuring tape
Fine‑tooth hacksaw or PVC cutter
Sandpaper (200‑grit)
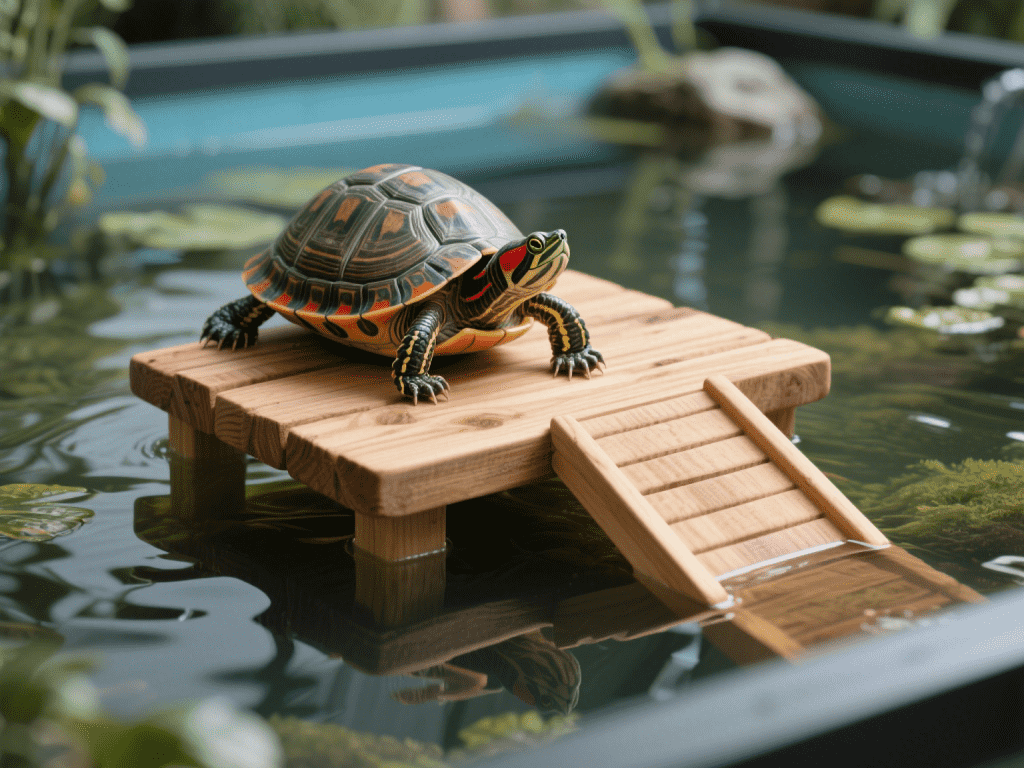
Build Option A: Floating PVC Frame with Rocks
Measure & Cut PVC:
Cut four lengths: two at tank width minus 2 cm, two at desired deck depth.
Assemble Rectangle Frame:
Use elbow and T‑connectors to join pieces in a rectangular loop.
Attach Mesh Deck:
Lay plastic mesh atop frame; secure with silicone at all contact points.
Add Rocks for Weight:
Evenly distribute smooth river rocks on mesh—rocks both steady the platform and provide grip.
Seal & Cure:
Run a bead of silicone around each connector and along mesh edges; let cure 24 hours.
Build Option B: Slate Tile Ramp Platform
Select Slate Tile:
Choose a 20 × 30 cm tile, no sharp edges.
Create Ramp:
Cut expanded PVC board into a 10 × 20 cm ramp; sand edges smooth.
Attach Ramp to Tile:
Bond one edge of ramp to tile underside with silicone; prop ramp angle at ~30°.
Weighting the Base:
Glue two 500 g flat river stones to back of tile for ballast.
Seal Joints:
Apply silicone along all seams; let cure fully before submersion.
Installation & Adjustment
Positioning: Float platforms toward the warm end of the tank, under UVB and heat lamps.
Stability Check: Gently push—platform shouldn’t tip or rock more than 1 cm.
Height Considerations: Surface should sit ~5 cm above waterline for easy climb.
Maintenance Tips
Weekly Cleaning: Remove platform and scrub with a soft brush to prevent algae buildup.
Silicone Integrity: Inspect seals monthly; reapply as needed to avoid leaks.
Adjustments: As your turtle grows, raise or widen the platform to accommodate larger sizes.
Troubleshooting & Expert Advice
Sinkage: Add more ballast under the tile or increase PVC diameter for buoyancy.
Slippery Surface: Embed small aquarium‑safe pebbles in silicone to create texture.
UV Exposure: Avoid direct sunlight on PVC—over time, it can degrade; keep under UVB bulbs instead.
By following these straightforward DIY plans, you’ll give your turtle a comfortable, health‑promoting basking area that looks great and lasts for years. Happy building—and happy basking!


Comments on "DIY Turtle Basking Platforms: Step‑by‑Step Builds" :